My First Task
Escrin allows smart contracts to run secure off-chain computation in bundles of work called tasks. Tasks are created implicitly by a contract when it provides an incentive for off-chain workers to submit task results. A task is anything a contract will accept.
This guide will walk you through assembling an AddingAtHome dapp that rewards people for contributing to the mission of discovering all numbers through the power of addition. To do this, AddingAtHome requests that a submission contain an proposed undiscovered number and two discovered numbers that add up to that new number. As a reward, AddingAtHome will gives the discoverer of the number a commemorative NFT.
This illustrative example does not need autonomous computation, but it does demonstrate the fundamental workflow of an Escrin workload.
By the end of this guide, you will know how to add Escrin to your dapp, create tasks, and fulfill them using your own workers. The steps below work through creating the tasks that will be fulfilled by workers created in the next set of steps.
Setup
This guide uses Remix because it is convenient for prototyping. The steps should be easy to follow if you are using a different development environment like Hardhat or Foundry.
Start by navigating to Remix. Once there, create a new workspace from the "OpenZeppelin ERC721" template.
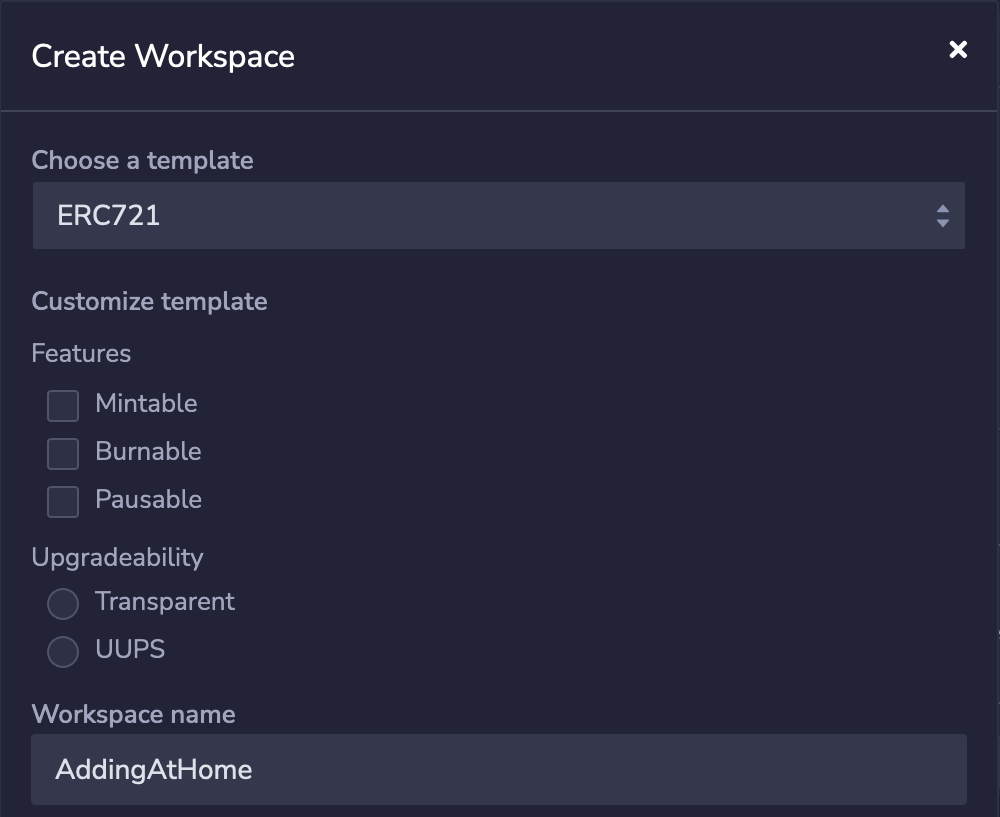
After the workspace has been created, you should see a file browser containing contracts/MyToken.sol. Rename it to AddingAtHome.sol and open it for editing.
In the file, first change the name of the token to AddingAtHome. Also add a line of code that gives token 1 to the creator, which allows the discovery of further numbers like 2, and 3.
// SPDX-License-Identifier: MIT
pragma solidity ^0.8.9;

import "@openzeppelin/contracts/token/ERC721/ERC721.sol";
import "@openzeppelin/contracts/token/ERC721/extensions/ERC721Enumerable.sol";

contract MyToken is ERC721 {
    constructor() ERC721("MyToken", "MTK") {}
contract AddingAtHome is ERC721Enumerable {
    constructor() ERC721("Adding@home", "SUM") {
        _mint(msg.sender, 1);
    }
}
Get Escrin
Escrin is easy to add to any dapp since the only required interface is ITaskAcceptor, which is only one function.
The Escrin Solidity library also contains a pre-made task acceptors and customizable widgets that make implementing this one function even easier.
The following code pulls in TaskAcceptorV1, which adds some scaffolding around ITaskAcceptor. All this next changeset does is add the Escrin Solidity library dependency, make the token contract a task acceptor, and implement the one required lifecycle hook.
import "@escrin/evm/contracts/tasks/v1/acceptors/TaskAcceptor.sol";
import "@openzeppelin/contracts/token/ERC721/extensions/ERC721Enumerable.sol";

contract AddingAtHome is ERC721Enumerable {
contract AddingAtHome is ERC721Enumerable, TaskAcceptorV1 {
    constructor() ERC721("Adding@home", "SUM") {
        _mint(msg.sender, 1);
    }

    /// Accepts one or more elements of a worker's task results submission
    /// @param _taskIds A sorted set of taskIds reported as complete in this submission
    /// @param _proof A proof of having completed the tasks
    /// @param _report Any extra data the submitter wants to provide
    /// @param _submitter The submitter's address
    function _acceptTaskResults(
        uint256[] calldata _taskIds,
        bytes calldata _proof,
        bytes calldata _report,
        address _submitter
    ) internal override returns (TaskIdSelector memory sel) {
    }
 }
This is a batch interface because it makes it work better with techniques like zero-knowledge proofs that can authenticate several items with one compact proof. For other proof methods, abi.decode is fairly widely applicable, as we will see below.
Accept tasks
Whether to accept a task is an important and often highly customized decision. That is why Escrin gives you all of the power of a function to express yourself. The pre-made acceptors are both drop-in solutions and starting points for your own task acceptance policies.
For AddingAtHome, it is fortunately very easy to tell if a submission is acceptable using the + and == operators.
Before verifying that each pair of discovered numbers is correct, they need to be unpacked from the _proof argument (they're proofs by construction). The numbers will be flattened as pairs into a single list so that they can be easily decoded using Solidity's abi.decode.
Once the addends are unpacked, the tasks can be verified and rewards can be distributed. For simplicity, AddingAtHome will require all items in a submission to be correct.
The following diff translates this overall approach into code:
function _acceptTaskResults(
    uint256[] calldata _taskIds,
    bytes calldata _proof,
    bytes calldata _report,
    address _submitter
) internal override returns (TaskIdSelector memory sel) {
    uint256[] memory pairs = abi.decode(_proof, (uint256[]));
    for (uint256 i; i < _taskIds.length; ++i) {
       (uint256 left, uint256 right) = (pairs[i*2], pairs[i*2+1]);
       uint256 discoveredNumber = _taskIds[i];
    }
    sel.quantifier = Quantifier.All; // Accept all
}
And now we add the logic for verifying each discovered number:
for (uint256 i; i < _taskIds.length; ++i) {
    (uint256 left, uint256 right) = (pairs[i*2], pairs[i*2+1]);
    uint256 discoveredNumber = _taskIds[i];
    // Verify the result.
    require(_exists(left), "undiscovered left addend");
    require(_exists(right), "undiscovered right addend");
    require(!_exists(discoveredNumber), "number already discovered");
    require(left + right == discoveredNumber, "faulty proof");
    // Reward the submitter.
    _mint(_submitter, discoveredNumber);
}
Your editor should contain this AddingAtHome implementation:
// SPDX-License-Identifier: MIT
pragma solidity ^0.8.9;

import "@escrin/evm/contracts/tasks/v1/acceptors/TaskAcceptor.sol";
import "@openzeppelin/contracts/token/ERC721/extensions/ERC721Enumerable.sol";

contract AddingAtHome is ERC721Enumerable, TaskAcceptorV1 {
    constructor() ERC721("Adding@home", "SUM") {
        _mint(msg.sender, 1);
    }

    /// Accepts one or more elements of a worker's task results submission
    /// @param _taskIds A sorted set of taskIds reported as complete in this submission
    /// @param _proof A proof of having completed the tasks
    /// @param _report Any extra data the submitter wants to provide
    /// @param _submitter The submitter's address
    function _acceptTaskResults(
        uint256[] calldata _taskIds,
        bytes calldata _proof,
        bytes calldata _report,
        address _submitter
   ) internal override returns (TaskIdSelector memory sel) {
        uint256[] memory pairs = abi.decode(_proof, (uint256[]));
        for (uint256 i; i < _taskIds.length; ++i) {
            (uint256 left, uint256 right) = (pairs[i*2], pairs[i*2+1]);
            uint256 discoveredNumber = _taskIds[i];
            // Verify the result.
            require(_exists(left), "undiscovered left addend");
            require(_exists(right), "undiscovered right addend");
            require(!_exists(discoveredNumber), "number already discovered");
            require(left + right == discoveredNumber, "faulty proof");
            // Reward the submitter.
            _mint(_submitter, discoveredNumber);
        }
        sel.quantifier = Quantifier.All; // Accept all
   }
}
Deploy
Now that AddingAtHome accepts tasks, we can deploy it to the Remix in-browser testnet so that a motivated worker can complete some tasks!
First the code needs to be compiled. You can do this using the green play button, the Save keyboard shortcut, or the big blue button in the Solidity tab as pictured below.
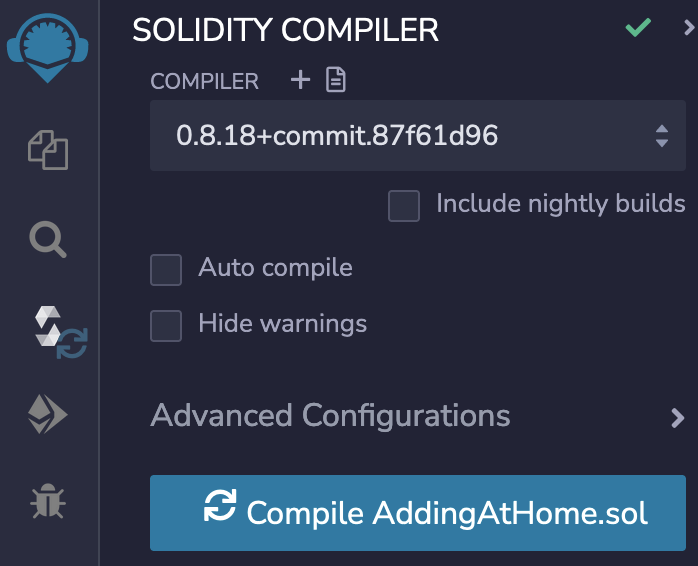
If this guide has been serving you well, compilation will succeed and you can proceed to the tab below: the deployment tab. You should be greeted now by a big orange button.
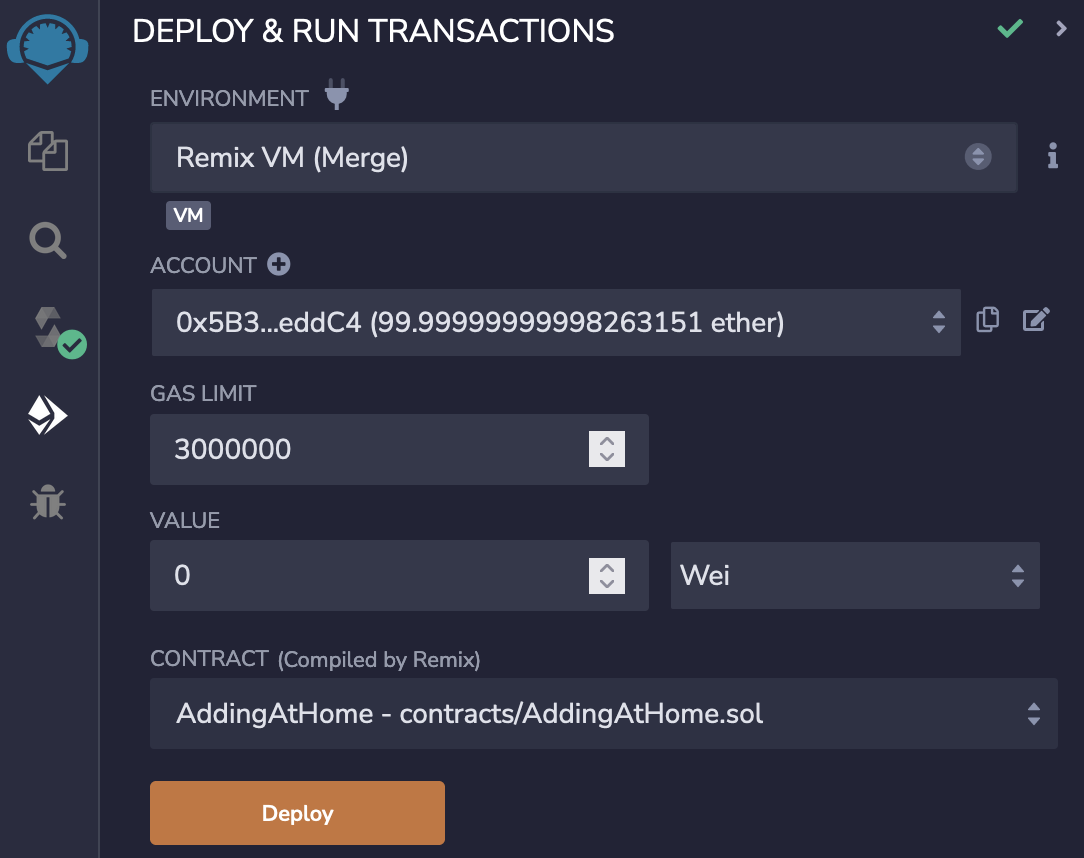
Click the button to deploy AddingAtHome to your in-browser testnet. Once this succeeds, you should see a new contract appear in the Deployed Contracts section of the tab, which marks the completion of this step.
Complete a task
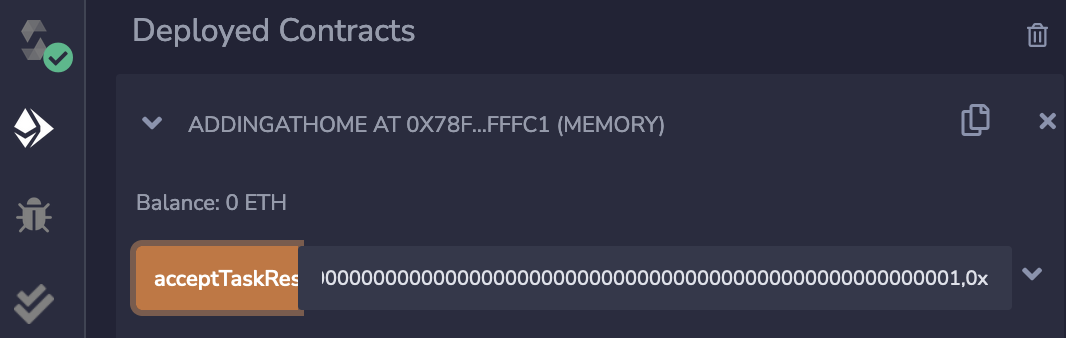
After opening up the AddingAtHome item under Deployed Contracts, you will see a form that lets you interact with the contract.
The acceptTaskResults method from ITaskAcceptor should be at the top of the form. Paste the following arguments into the arguments box of acceptTaskResults. They will discover the number 2 by adding 1 and 1.
[2],0x0000000000000000000000000000000000000000000000000000000000000020000000000000000000000000000000000000000000000000000000000000000200000000000000000000000000000000000000000000000000000000000000010000000000000000000000000000000000000000000000000000000000000001,0xIt should look like this:
You can then click the orange acceptTaskResults button (or the transact button if you clicked into it). That should cause a transaction to be successfully submitted and shown in the console.

So now, if you were to check who the discoverer of 2 is, it would be your wallet address because you have successfully created and completed your first task! 🎉
Recap & Next Steps
In this tutorial we deployed a simple contract that uses Escrin to create off-chain tasks. We were also able to complete a task on our own through our browser.
Even though AddingAtHome is a simple problem, it illustrates the idea of a task and how a contract's definition of its acceptance drives it to completion.
In a more realistic scenario, task verification would require execution in a trusted execution environment (TEE), and there would be similar policies governing the use of secret keys. Additionally, it is much more convenient if tasks could be done automatically without anyone clicking buttons. These are all concepts that will be covered in the next tutorial!